The Glitter Sandwich - Barry M & Girly Bits
Posted on October 16 2012
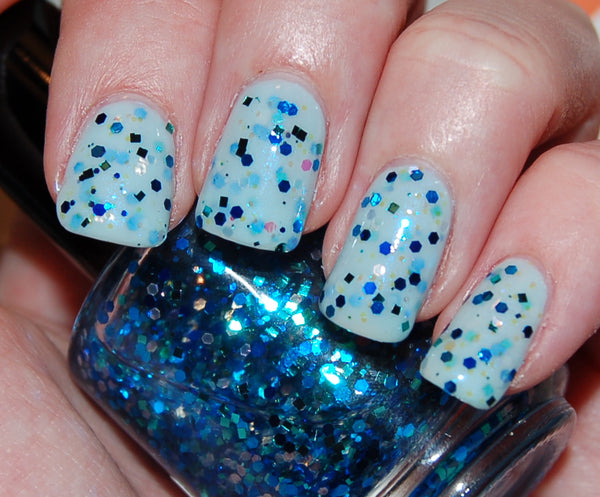
Good morning lovelies! I wanted to do a quickie post today inspired by one of my "most liked" photos on my Instagram account (@madebykate) - it's a gorgeous blue glitter sandwich including Barry M Blue Moon and Girly Bits Wet Bikini!!


So the above was taken on September 22 with my iPhone, so I redid the manicure yesterday for you and there has been a real lack of sun around here lately, so most of the photos that I did take use the flash and are indoors.
What is a glitter sandwich you ask? Well, it's basically just layers of glitter (I prefer glitter in a clear base) and sheer or jelly polish - it creates much more depth than if you were to just put a coat of glitter on top of your manicure. You'll be able to see the depth in a couple of the photos. I'll explain step-by-step what I did to get this look:
1 - Use a base coat (whatever works for you, everyone is different)
2 - One thin coat of Barry M Blue Moon, wait for it to dry.
3 - One coat of Girly Bits Wet Bikini, wait for it to dry.
4 - One thin coat of Barry M Blue Moon, again, wait for it to dry.
5 - One coat of Girly Bits Wet Bikini, and again, wait for it to dry.
6 - Finish the manicure with a top coat, if the glitter is gritty or bumpy you may want to use a thicker top coat like Seche Vite or Gelous. And you're done!
So this may take a little longer to do than a normal manicure, but the looks is definitely worth it in my opinion.

You can see the gorgeous shimmer in Barry M Blue Moon really plays off of the Girly Bits Wet Bikini glitter!
I apologize for the state of my cuticles - it's so darn dry here and I've been packing tons of orders!!


Outdoors, no flash - our dreary Canadian fall - boo!

Macro to show the depth of the glitter - outdoors, no flash.
I'm kind of obsessed with the glitter sandwich, so there may be more of these on the way - I hope you don't mind! I love showing how you can use glitter polish - it's so versatile! I fell in love with this kind of manicure thanks to Kirsten at GlittaGloves for her blog post here.
Do you guys sandwich your glitter?!
Thanks for reading, cheers!
Katie
Comments
0 Comments
Leave a Comment